


Installing a Bike Bottle Cage: A Step-by-Step Guide
Introduction
Whether you are out for a recreational ride or a business cycle, it’s always important to stay hydrated. A bike water bottle cage makes it easy for a rider to carry a water bottle on the bike. It is easily accessible making it an essential feature for all bikers. With our guide, you will learn how to effectively and securely attach the water bottle holder to your bike, at no point will the holder fall off.
Tools and Materials Needed
To begin, here is a list of what you will need:
Bike with mounting holes – Most new bikes have holes drilled in them which are standard for water bike bottle cage.
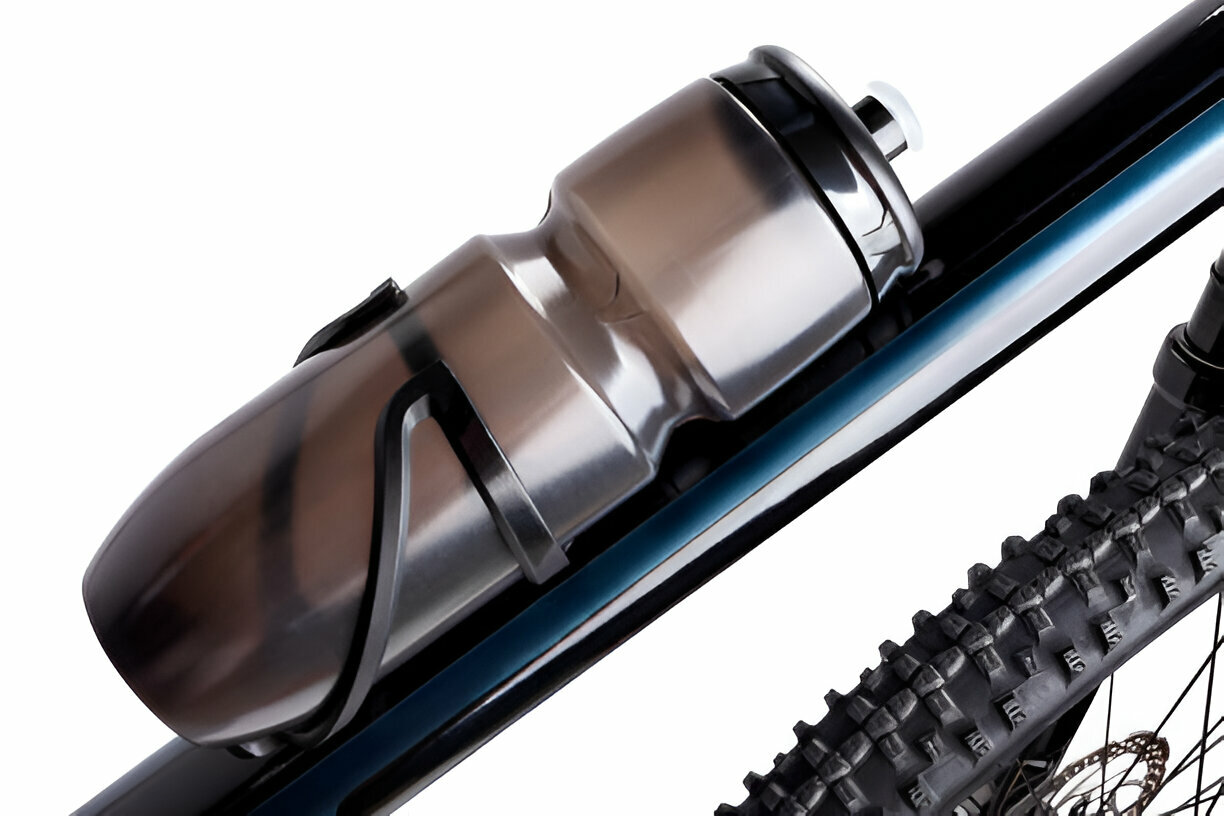
• Water bottle cage- Ensure that the road bike water bottle cage is of a higher grade and fits the bike frame as well as the bottle.
• Screws and washers – M5 bolts will also do the job if the bicycle bottle cage doesn’t have screws and washers included.
• Allen wrench (4 to 5mm) – An Allen wrench will be needed to tighten the bolts in place.
• Cleaning cloth – This is important, use it to wipe away any dirt or debris from the area where you will attach the mounting area.
Step 1: Choose the Location
Picking a position for the bike bottle cage should be done carefully since it affects accessibility and balance. Three common placements are:
- Down tube – This is perhaps the most common placement as it gives ready access to the bike bottle.
- Seat tube – A secondary placement when extra hydration is required for longer rides.
- Handlebars or seat post – The position is good for bikes that do not have holder mounts, but will need some form of adapters or strap-on bicycle bottle holders.
Step 2: Prepare the Area
A tidy area guarantees proper installation of the cage. Thus use a damp cloth to:
- Clean the frame at the position where it bike bottle cage will be put.
- Get rid of the dirt, grease or any other particles that may be in the mounting holes.
- Make sure the threads in the holes are free of dirt to avoid stripping the bolts.
Step 3: Align the Bottle Cage
- Position the bicycle bottle holder over the mounting holes.
- Make sure it is level with the bicycle frame and is not obstructing cables or other parts.
- Also, ensure the correct orientation, as a lot of bike bottle cages, are directional and should face upright.
Step 4: Insert Screws
- If the screws and washres are supplied with your road bike bottle cage, put the washres over the screws first.
- To prevent cross-threading, use fingers to hand-thread the screws into their corresponding mounting holes.
- For bikes without holes, an adapter or strap-on bottle holder can be used.
Step 5: Tighten the Screws
- To tighten the screws, utilize a 4 mm or 5 mm Allen wrench.
- Tighten one screw partially, then work on the second screw.
- Continue alternating between both screws until comfortable tension is achieved.
- Check the frame to avoid stripping the threads or damaging from over-tightening the screws.
Step 6: Test the Fit
- Put the bike bottle into the bike bottle cage.
- Lightly shake the bike to determine if any rattling or movement occurs.
- If there is movement, the bike bottle holder needs further tightening.
- Tighten only enough to keep it securely in place so that the bike bottle is still easily accessible when riding.
Installing a Bike Bottle Cage Without Mounting Holes
Not every bike has screws that are pre-installed for a bike bottle cage. These are some other mounting options that can be utilized for this type of bike:
1. Bottle Cage with Straps
- Fits all frame types and quickly attaches with adjustable straps to the bicycle bottle holder.
- Can be mounted on the handle bars, frame or even the seat post.
- To avoid any movement while riding, make sure all straps are tight.
2. Bottle Cage Adapter
- Attaches to the seat post or the hand grips.
- Can accommodate a bike bottle cage at its standard mounting hole.
- Recommended for road and mountain bikes that do not have original equipment mounting brackets.
3. Saddle Cage Mount
- Attaches at the back of the saddle with a mounting kit.
- Useful for carrying several bike bottles on long bicycle rides.
- It is important to make sure the drinking bottle holder is tightly secured to the bracket to stop unwanted movement.
Choosing the Right Bike Bottle Cage
1. Material Selection
- Bike bottle cage do come in various materials each with their own separate advantages:
- Aluminum – Light, strong, and cheap.
- Plastic – Cheap and can come in multiple colors.
- Carbon Fiber – Lightest in weight and ideal for professional cyclists.
- Titanium – Most durable but costs a lot.
2. Retention System
A bike bottle holder should ideally protect the bottle to some extent while at the same time making sure that accessing it is as easy as possible. Look for cages that have:
- Strong grip arms.
- Secure exit points.
- Different entry points.
3. Bottle Entry Method
- Top-entry – slotted design holder for the bike bottle holders.
- Side-entry – Best for children bikes or frames with limited space.
- Left or right specific – For some riders having a dedicated entry point is useful.
Conclusion
No matter how beginner you may be, fitting a bike bottle cage is one of the simplest yet most effective modifications that enhances any cyclists experience. When using either the strap-on bicycle bottle holder or the standard road bike bottle cage, always make sure that the fit of the cage is secure in order to keep the water bottle accessible during the rides. Adhere to these steps to ensure that your bike bottle holder is fitted properly and you are able to stay hydrated at all times during your cycling journeys.
So, ready to improve your ride? Pick the ideal bike bottle cage, and never have to worry about drinking on the go!